All code of this tutorial can be accessed at my GitHub repo
Time to Write OS Tutorials in UEFI
There are quite a lot of OS tutorials and YouTube videos out there. However, most of them are written to boot in BIOS mode.
However, it is 2023 now, 19 years since Intel open sourced UEFI. Meanwhile, Intel is trying to replace x86_64 with x86_64s, which is a pure 64bit platform. And, of course, it will only support UEFI (UEFI CSM will be removed).
UEFI is a more secure and more powerful booting system. Almost all modern operating system are booted via UEFI. There seems to be no reason to continue writing OS tutorials for BIOS. Taking care about switching to long mode, or enabling paging is no longer necessary, but annoying technology details.
After searching Google, I see there are very limited information about writing OS in UEFI. The information are scattered in different places, and it is hard to find a complete tutorial. Therefore, I decided to write a series of tutorials about writing OS in UEFI.
Setup Test Environment
Most OS tutorials uses QEMU for the test environment for following benefits:
- Only requires normal user permission to execute (QEMU can run in a emulator mode, which means it doesn't need to access any hardware virtualization infrastructure, e.g. KVM).
- It is very flexible, to be configured with different hardware configurations.
- It support wide varieties of client CPU architectures. Additionaly, emulation can run on host CPUs with different architecture to client CPU.
- It supports emulating BIOS or UEFI as firmware interface.
- It supports debuggers, which ease debugging OS kernels (you usually uses logging to debug kernels on bare metal).
Therefore, in this tutorial, we uses QEMU for the test environment as well. Well, I uses a MacBook Pro, so the tutorial's command lines are for macOS, but it is easy to translate to Linux version.
- Install QEMU
We usually use homebrew to install qemu:
brew install qemu
- Create workspace for the project
mkdir tony-os && cd tony-os
git init .
mkdir -p src build buildenv {target,dist}/x86_64
- Prepare UEFI firmware for QEMU
The open-sourced UEFI firmware from Intel is called the TianoCore project. The code is also hosted on GitHub.
In this project, they developed a firmware supporting QEMU that provides a UEFI environment.
We can just download it from the CI artifacts server, find a file starts with "edk2.git-ovmf.x64", decompress it, and copy the usr/share/edk2.git/ovmf-x64/OVMF-pure-efi.fd to our workspace's target/x86_64/bios.bin.
- Prepare the script to test our NON-EXIST under UEFI
Write run.sh script under our workspace:
#! /bin/bash

qemu-system-x86_64 \
    -L target/x86_64 \
    -bios target/x86_64/bios.bin \
    -hda fat:rw:dist/x86_64
Then, make it executable: chmod +x run.sh.
If you run this script, it should start and showing an image of TianoCore.
Now your workspace should be like this:
build
buildenv
dist
|- x86_64
src
target
|- x86_64
   |- bios.bin
run.sh
Prepare a build environment
Docker is a perfect platform to solidify your build environment. Therefore, we can prepare a Dockerfile under the buildenv folder, to build an image of the build environment:
FROM rust:1.73-bullseye

RUN rustup target add x86_64-unknown-uefi

VOLUME /root/env

WORKDIR /root/env
Rust has tier 2 support for UEFI targets, which means it is not officially supported. However, it is good enough for us to write a toy OS.
Thanks to David Rheinsberg(@dvdhrm) and Nicholas Bishop(@nicholasbishop)
Build the docker image:
docker build --platform linux/x86_64 buildenv -t tonyos-buildenv
Prepare a simplist kernel
- Create the build script running in the build container: buildscript.sh
#! /bin/bash

# build the kernel
cargo build --target x86_64-unknown-uefi || exit 1

# copy the built kernel to the dist directory
mkdir -p dist/x86_64/EFI/BOOT || exit 1

cp target/x86_64-unknown-uefi/debug/tonyos.efi \
   dist/x86_64/EFI/BOOT/BOOTX64.EFI || exit 1
- Create the build script to invoke the container: build.sh
#! /bin/bash

docker run -it \
    --platform linux/x86_64 \
    --rm \
    -v $(pwd):/root/env \
    tonyos-buildenv \
    ./buildscript.sh
- Prepare the kernel entry file
src/main.rs
#![no_main]
#![no_std]
use uefi::prelude::*;
use uefi_services::*;
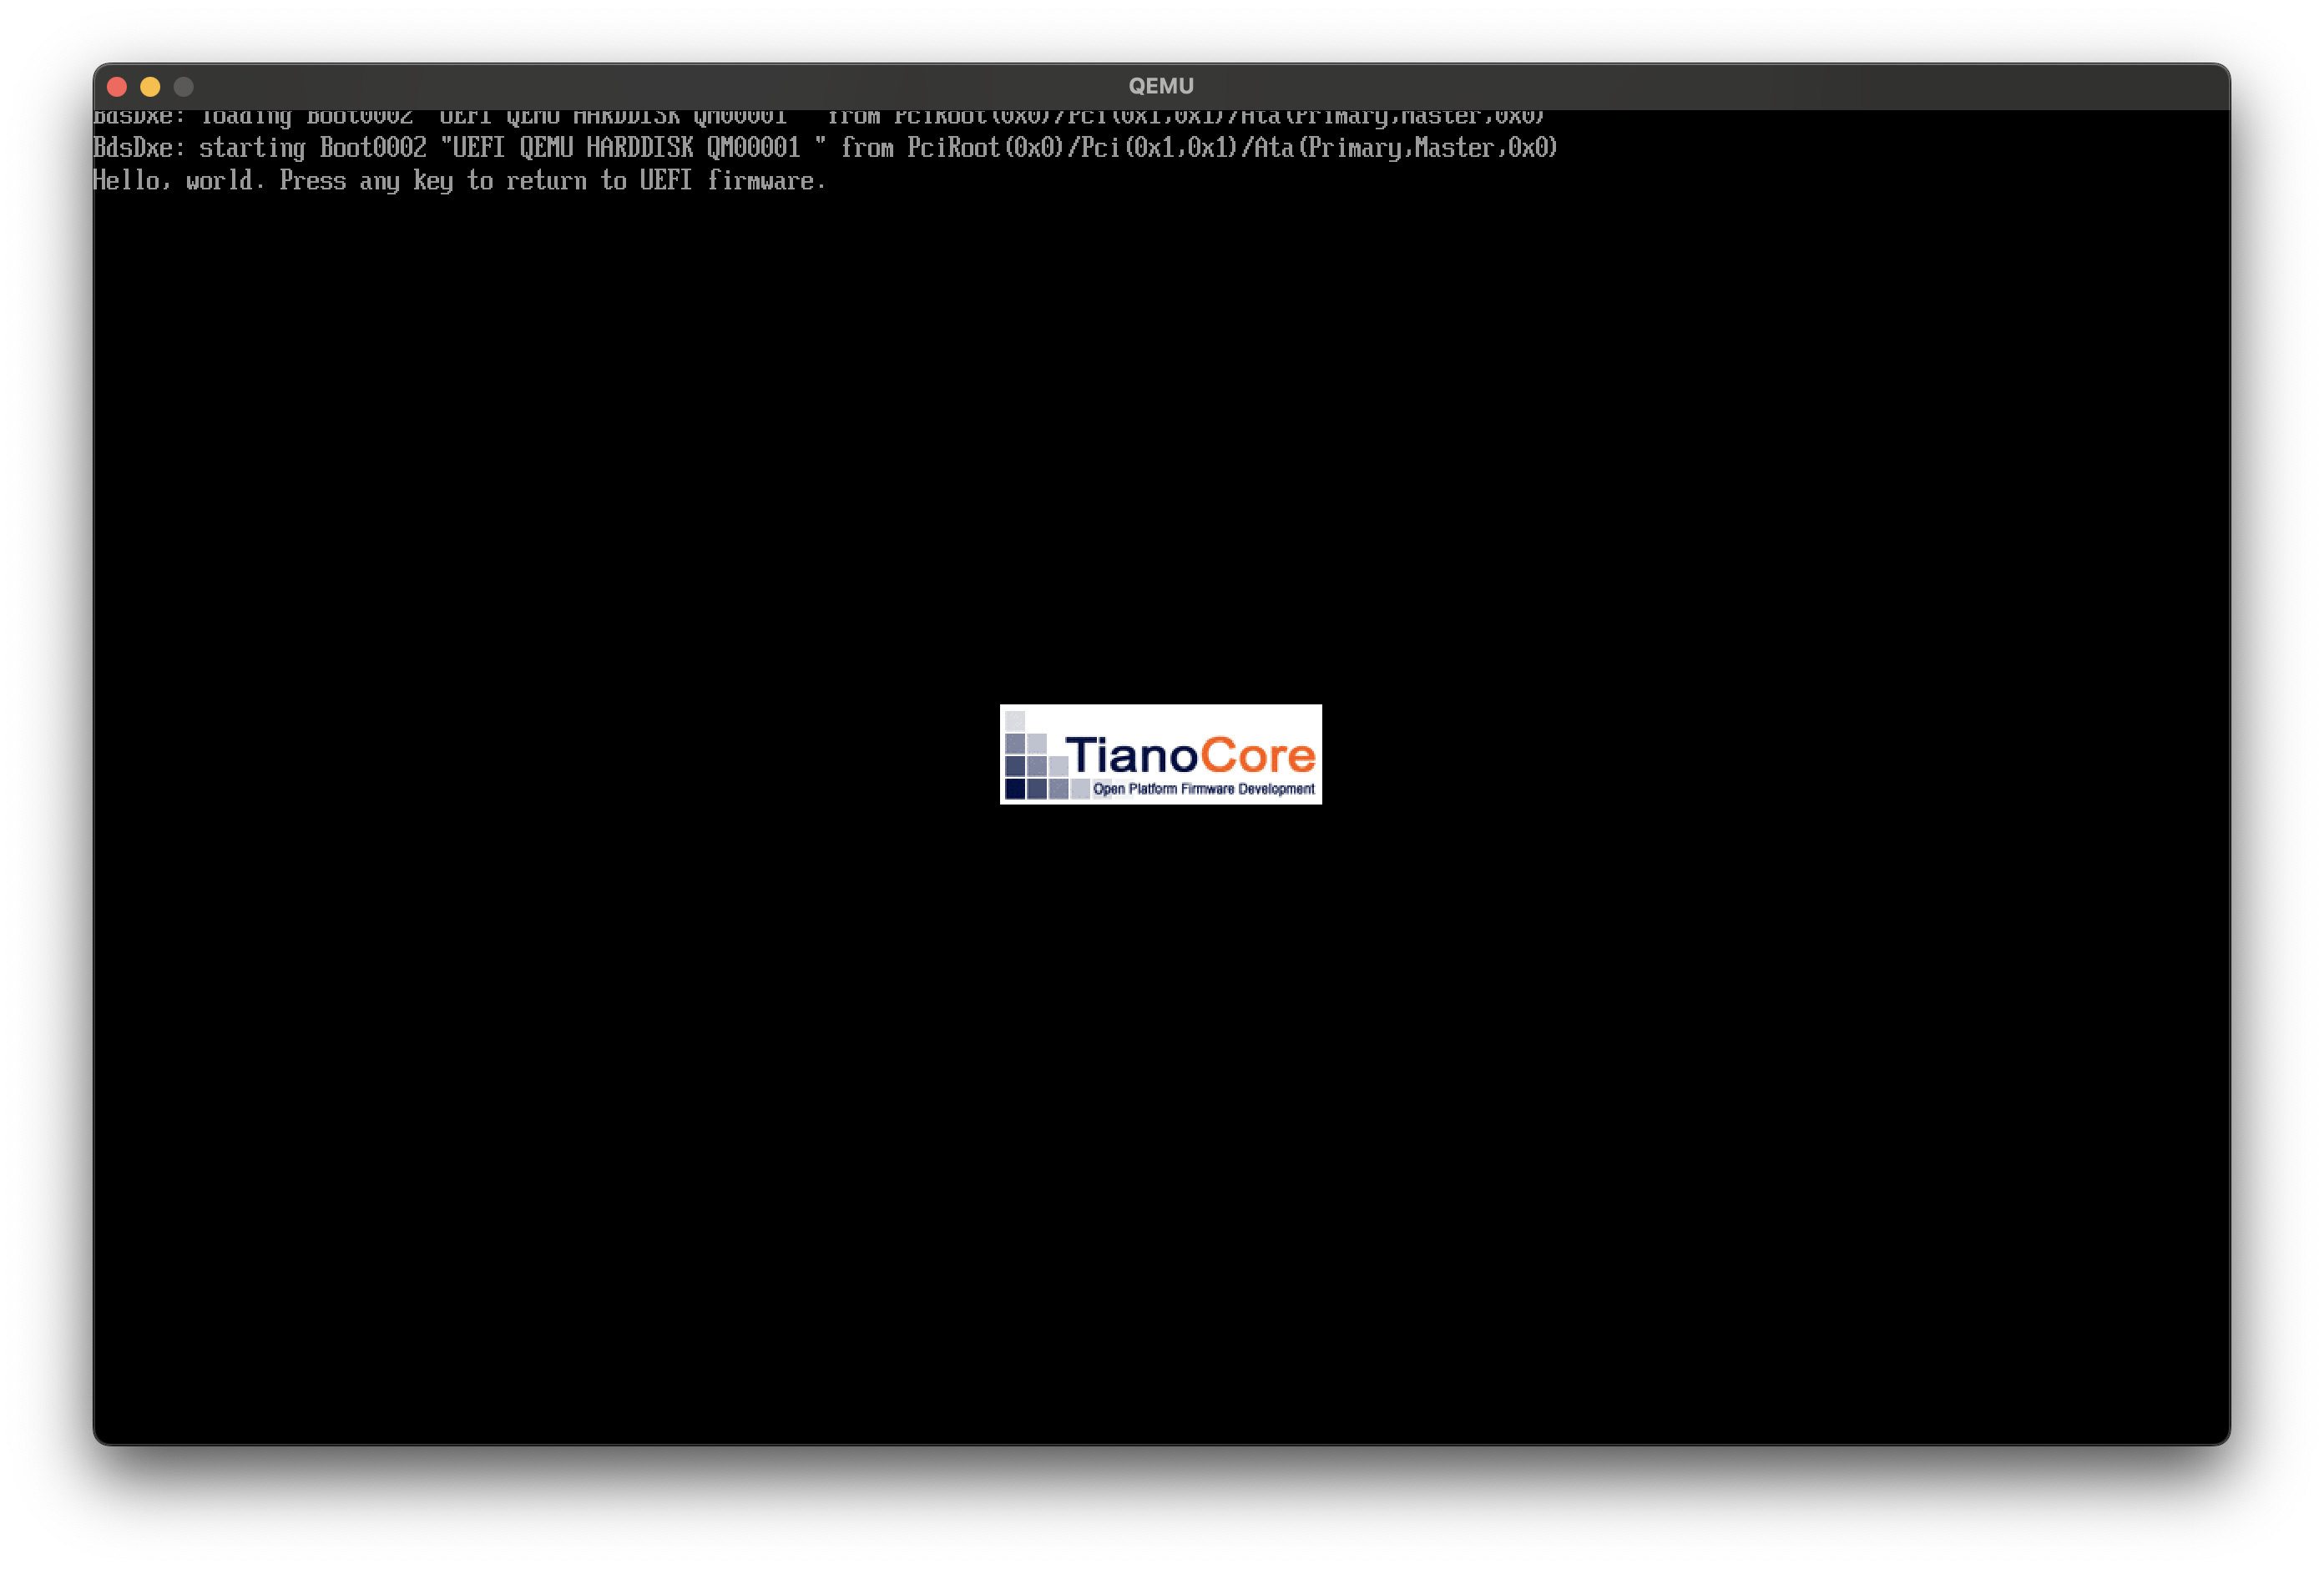
const HELLO_STR: &str = "Hello, world. Press any key to return to UEFI firmware.";
#[entry]
fn main(_handle: Handle, mut system_table: SystemTable<Boot>) -> Status {
uefi_services::init(&mut system_table).unwrap();
println!("{}", HELLO_STR);
let mut events = [ system_table.stdin().wait_for_key_event().unwrap() ];
system_table.boot_services().wait_for_event(&mut events).discard_errdata().unwrap();
Status::SUCCESS
}
- Prepare the
Cargo.tomlfile
[package]
name = "tonyos"
version = "0.1.0"
authors = ["Tony Huang <tony@tonyhuang.dev>"]
edition = "2021"

[build]
build-stage = 1
target = ["x86_64-unknown-uefi"]

[dependencies]
uefi = { version = "0.25", features = ["alloc"] }
uefi-services = "0.22"

# the profile used for `cargo build`
[profile.dev]
panic = "abort" # disable stack unwinding on panic

# the profile used for `cargo build --release`
[profile.release]
panic = "abort" # disable stack unwinding on panic
Build and run your first UEFI kernel
Now, we can build and run our first UEFI kernel:
./build.sh && ./run.sh
Read more
Next Article: Fetch information about key hardware
Change history
- 2023-10-24: migrate to
ueficrate